

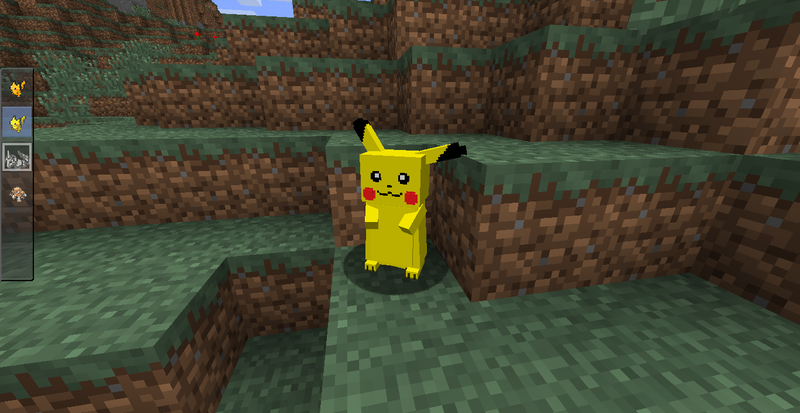
Pixelmon brings pokemon and Minecraft together allowing you to start your pixelmon journey of capturing Pokemon while surviving the world of Minecraft.
Setting up the server
Download Forge Installer
The first step to getting Pixelmon going is to download the forge installer, forge is a different type of server that will allow us to play the pixelmon mod.
The Forge installer has two parts to it, the server and the client though it comes as one installer so you only need the one file.
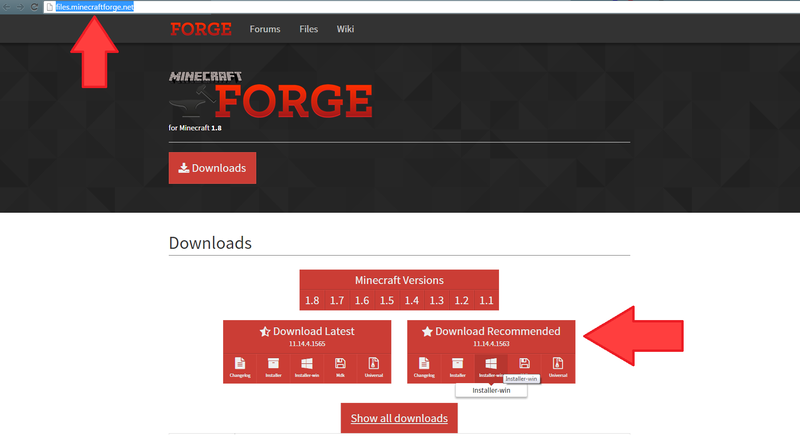
To download the Forge installer head to http://files.minecraftforge.net/
If you are on a Windows Operating System you can download the Windows installer otherwise for any other OS just download the regular Installer which is a cross platform .jar file.
Install Forge Server
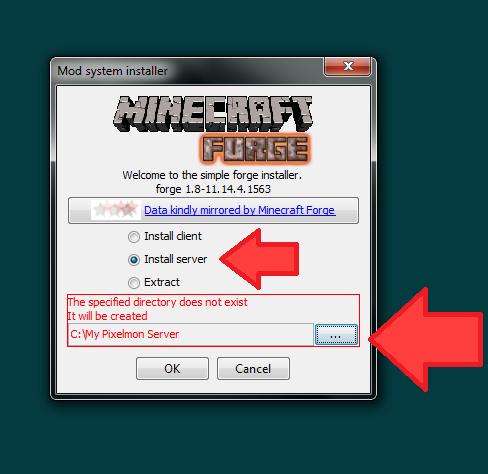
Run the Forge installer that you downloaded in the previous step, you will be shown a screen asking whether you want to install the server or the client and where you want to install to.
Firstly we want to install the server so we will select "Install Server" the we need to select a directory where we want our server to be installed, in my case I have selected a new folder in the C drive called "My Pixelmon Server"
After this is done click ok and the Forge Server will be downloaded and installed.
Download Pixelmon
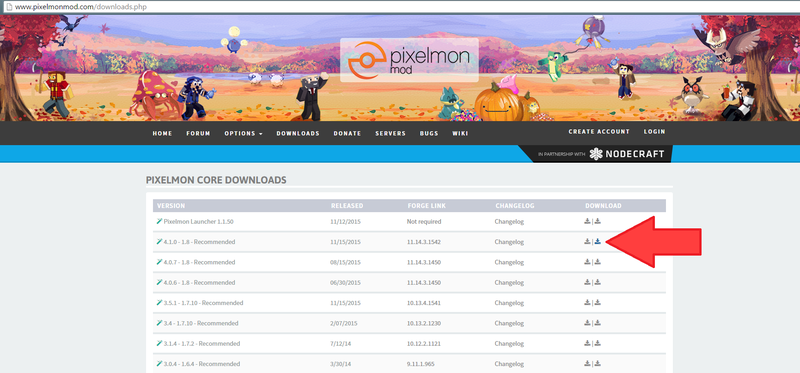
The next step is to download the Pixelmon Mod, to do this head over to http://www.pixelmonmod.com/downloads.php and download the latest version, in this case we do not want the launcher, we just want the mod, you can use the launcher for the client side but we want the mod file for the server side.
Install Pixelmon mod to the server
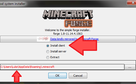
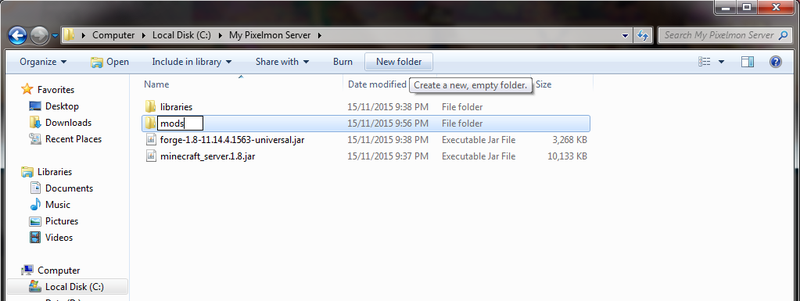
The next step is to add the Pixelmon mod to the server, to do this we need to copy the .jar file we just downloaded and paste it in the mods folder of our server directory, the mods folder may need to be created manually by going to New Folder and naming it "mods" in all lowercase.

Setting up the server
Setting up the server is the same process as setting up a standard minecraft server, you have to accept the eula to get the server running and can customize your server settings in the server.properties file, to get started setting up your server you first need to run it so all the nessesary files and folders are created, to do this simply double click the forge jar file in your servers directory.
After launching the forge server you will have to wait a few minutes while the server sets everything up, once you get the message "You need to agree to the EULA in order to run the server." you can close the server.
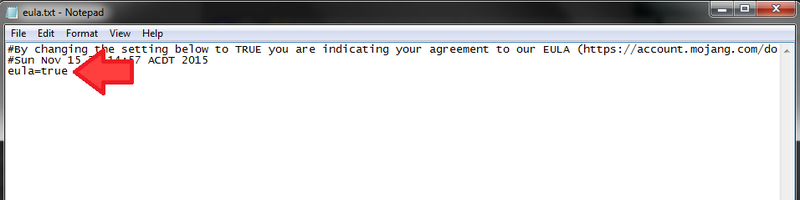
You will then need to open the eula.txt file in the server directory and change the text value from false to true, then save and close.
Setting up the client
Installing forge
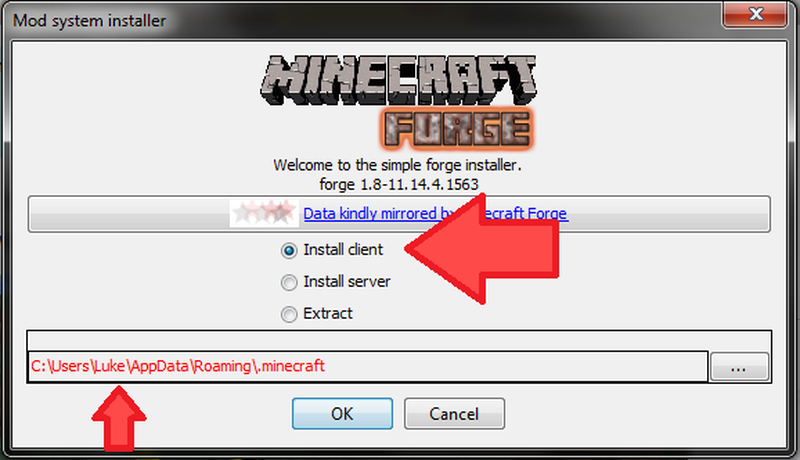
To install the client version of forge all we need to do is run the forge installer that we downloaded in the previous steps and click the install client button, the directory of Minecraft should be selected by default, if not you will need to select it then click ok.
Adding the Pixelmon Mod to the client
We also need to install the Pixelmon Mod to the client, its a similar process to the server except we are copying it to the mods folder in the Minecraft directory, to find the Minecraft directory navigate to C:\Users\[YOUR COMPUTER USERNAME]\AppData\Roaming\.Minecraft
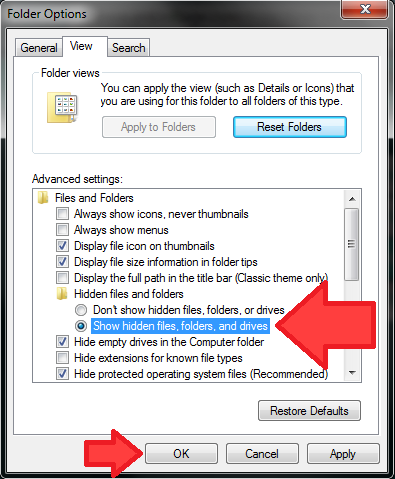
If you cannot find the AppData folder you will need to enable hidden folders in the control panel, to do this go to the start menu, click control panel, then click folder options, go to the view tab and then click Show hidden files, folders, and drives, Click ok and you should now be able to see the AppData folder.
Similarly to the server procedure the mods folder may not exist and you may have to create it manually, just go to new folder and name it mods.
Play Pixelmon
Thats it, thats all the steps required to get started playing Pixelmon, just launch Minecraft as usual, ensure you are playing on the forge profile, click play Minecraft and you're good to go! Enjoy.
- Due to the resources required by Minecraft as well as Pixelmon it is recommended that you install the 64 bit version of Java which will allow you to allocate more RAM to Minecraft leading to much less lag in game.
View All Comments /Add Comment