

Sleep is a useful function especially for laptops when you want to close and start your laptop fast while saving energy. The default setting of Windows will make your computer sleep after some time to save energy and you can wake up your computer in a few seconds which won't affect your work productivity. However, sometimes you may need to disable the function. For example, you want to download a huge file which will takemany hours, but at the time you need to leave your computer, then you need to make your computer not to sleep. Here are the steps on how to disable the sleep function in Windows.
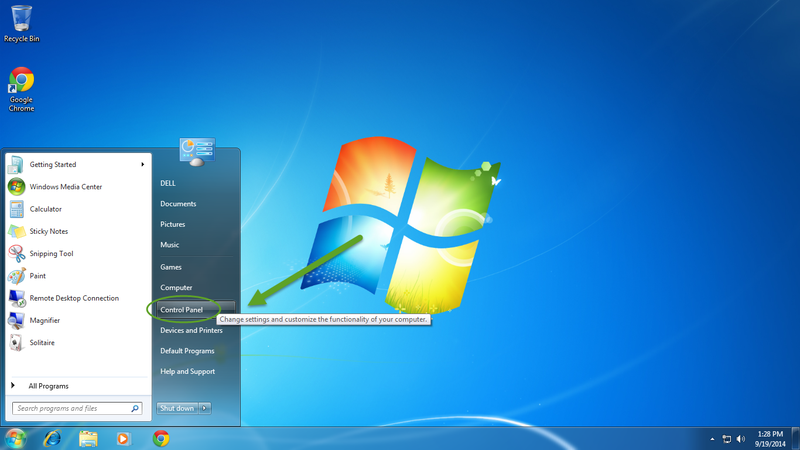
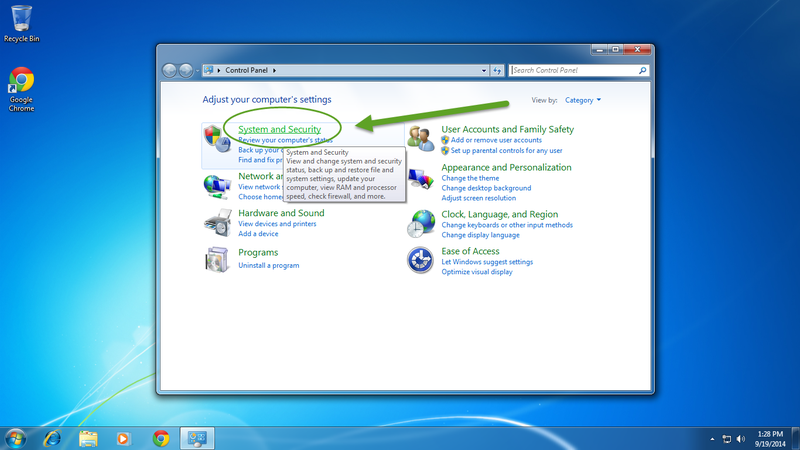
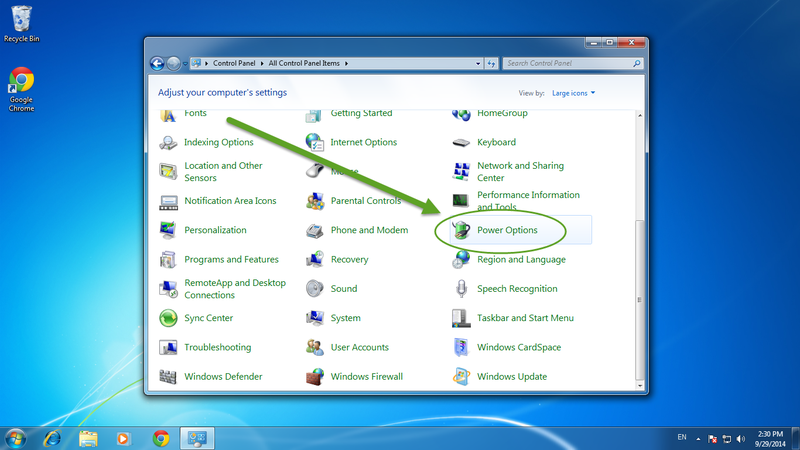
Steps - How to Make Computer Not to Sleep


If the items in Control Panel are shown as large icon, you can simply find "Power Options" at the end of the windows and click on it.
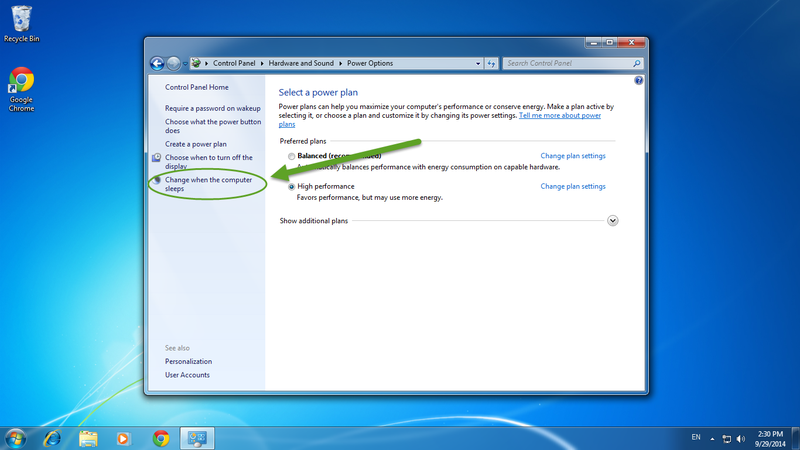
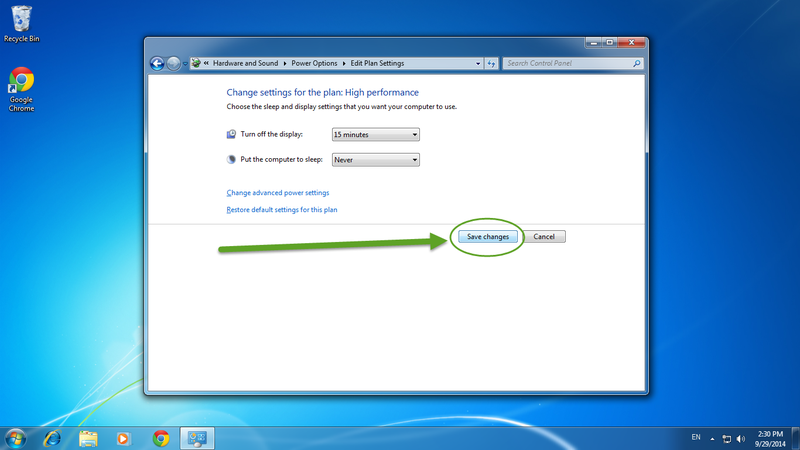
In the following window, click on the pull-down list and select "Never" to make the computer not sleep all the time.

- You can repeat the steps and change the time for "put the computer to sleep" to enable the function of sleep at any time.
View All Comments /Add Comment